
How to order labels and stickers
Everything happens on the product page: price, design, proof and basket, in about five minutes
There is no quote to wait for and no proof to email. Choose a product, set your options and the price updates as you go. Design your label online or upload your artwork, check the instant proof, approve it and add it to your basket. Once you pay, your order goes straight into production and you can follow every item from your account.
Choose a product to start →- 1
Choose your product
Start in the shop. Products are grouped by material (waterproof vinyl, paper, clear, metallic, frosted and so on) and by use, such as candle, cosmetic or wine labels. If you are not sure which material you need, every product page has a full specification table, and the artwork guidelines explain the finishes. Pick the one that fits and open its page.
- 2
Set your size, shape and material
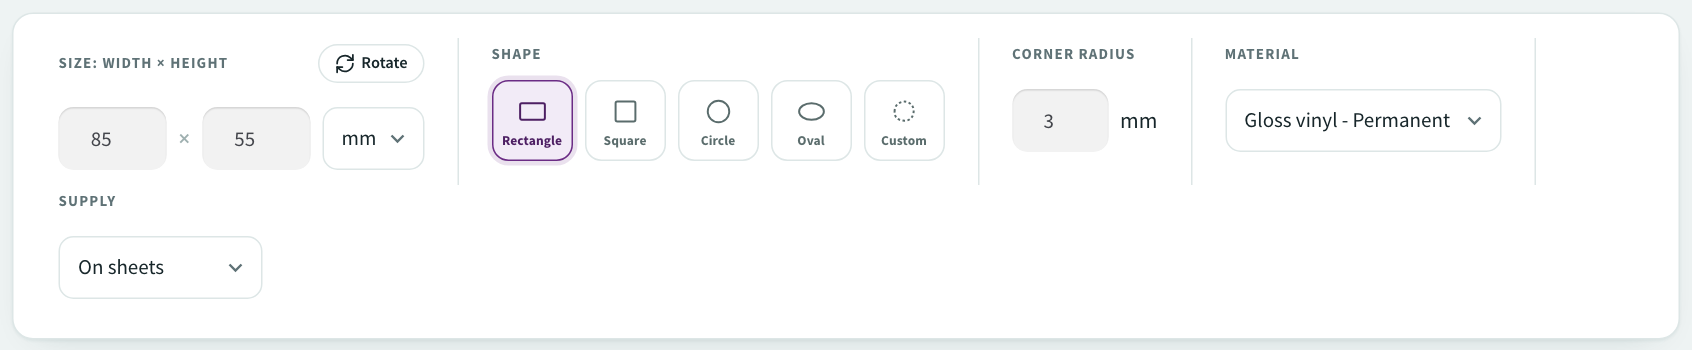
The options bar sits just under the product title. Type your width and height in mm, cm or inches, and use Rotate to swap them. Choose a shape: rectangle, square, circle, oval, or Custom to draw your own cut outline. Set the corner radius for rectangles, pick the material where the product offers a choice, and choose how you want the labels supplied, on sheets or as kiss-cut singles. Paper and foil products use a list of set sheet sizes instead of a free size.
- 3
Set your quantity and see the price
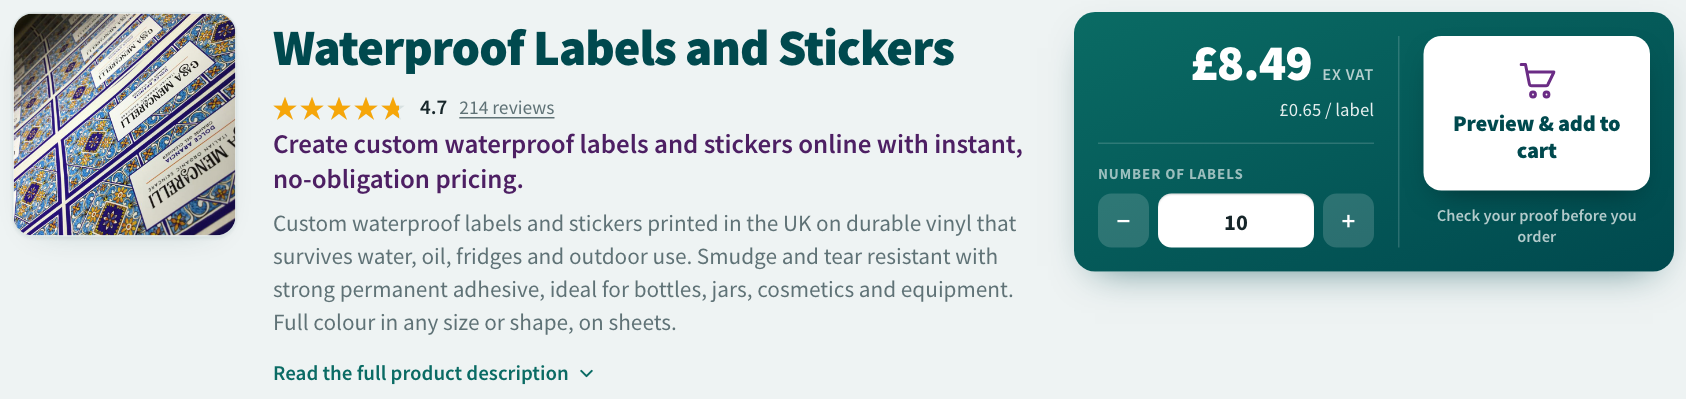
The price card at the top of the page updates every time you change an option. Type the number of labels you want or use the plus and minus buttons. The card shows the total excluding VAT and the price per label, and the per-label price falls as the quantity rises. There is no minimum order. A price breakdown for larger quantities is shown under the designer.
- 4
Design online or upload your artwork
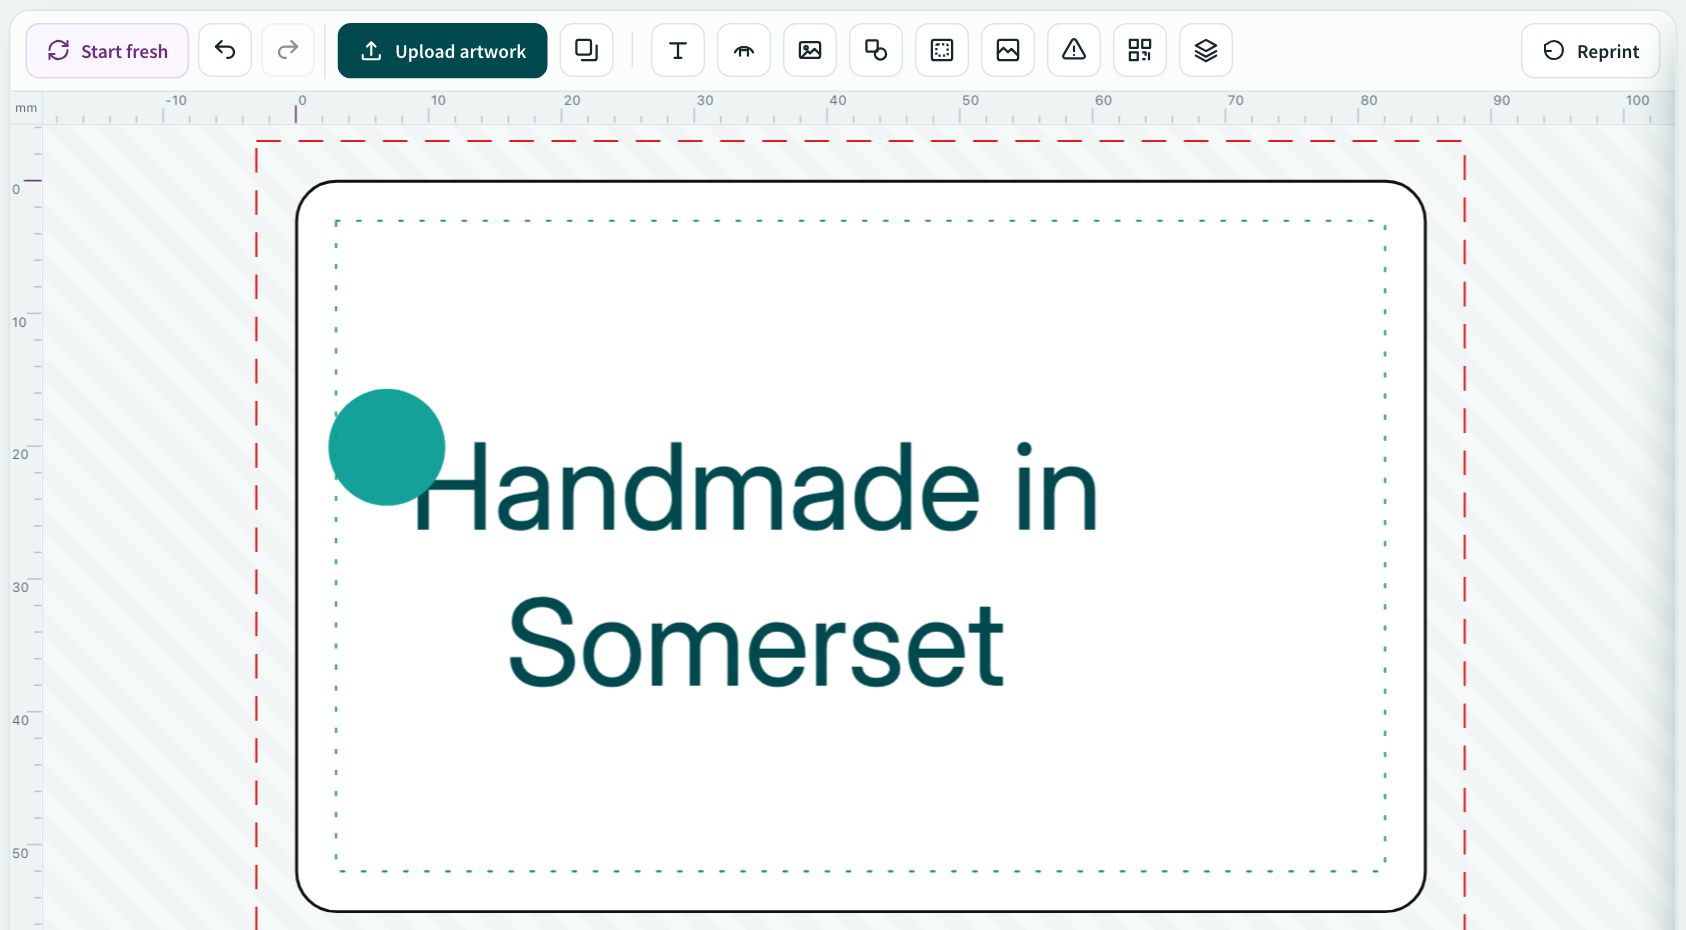
The designer opens below the options with your label at true size. The black line is the cut, the red dashed line is the bleed (run backgrounds out to here) and the green dotted line is the safe area (keep text and logos inside it).
Have print-ready artwork?
Press Upload artwork and choose your PDF, PNG or JPG. It is placed on the label at true size against the cut line. PDFs are never resampled, so they print exactly as you made them. You can still add text, a barcode or a QR code on top.
Designing from scratch?
Use the toolbar to add text and curved text, images, shapes, a border, a background colour, compliance icons and QR codes or barcodes. Click any item to change its font, colour, size and position. Undo is always there if you change your mind.
Need more than one design in the same size, say three flavours of the same jar label? Use the add design button in the bar under the designer. Each design gets its own page and its own quantity within the same order.
- 5
Preview and approve your proof
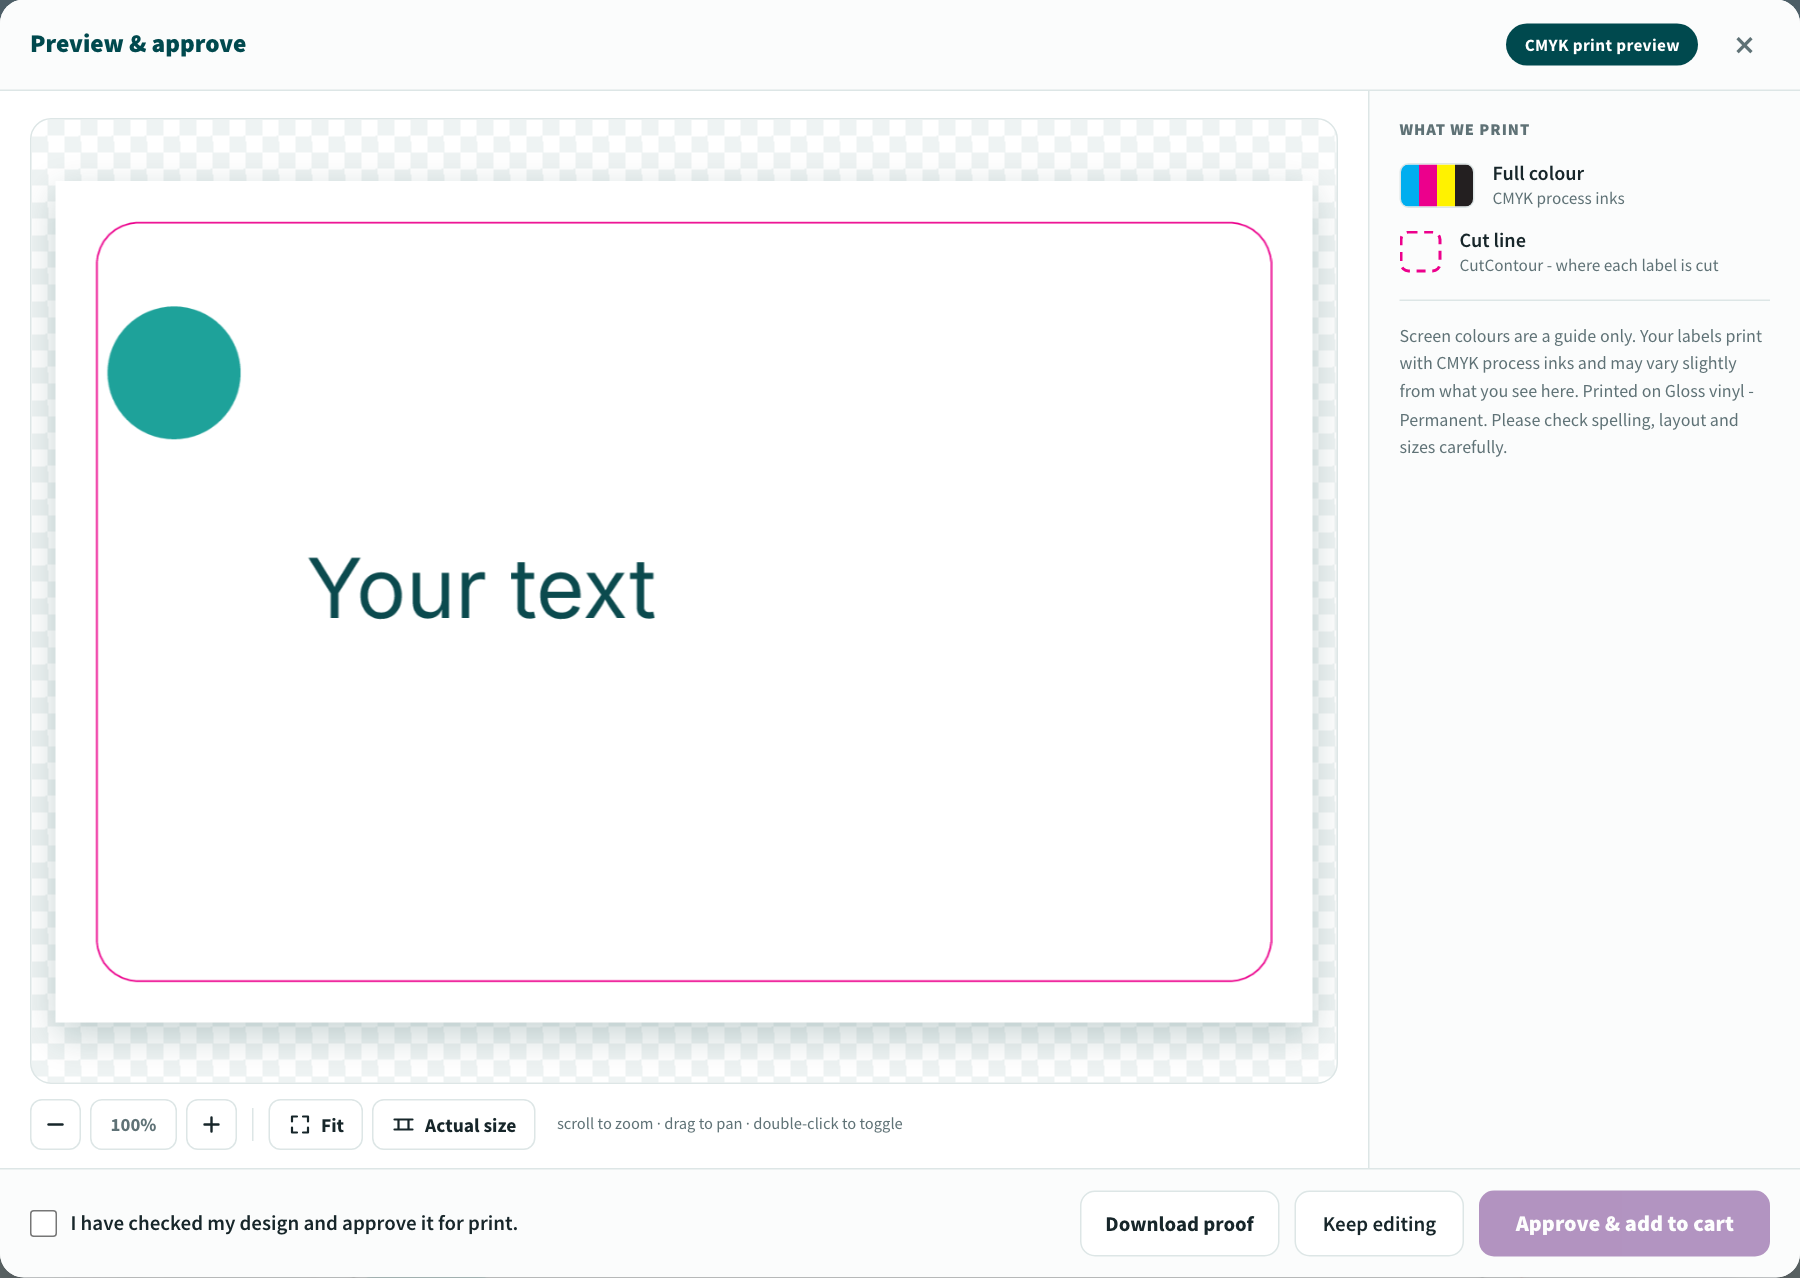
Press Preview & add to cart. You see the print proof: your design cropped to the label with the cut line shown in pink, in CMYK print colour rather than screen colour. Zoom in, check it at actual size, and open the 3D view to peel a label off its backing. Read it carefully: spelling, sizes, position against the cut line and colour. We print exactly what you approve. When you are happy, tick I have checked my design and press Approve & add to cart. Use Keep editing if anything needs changing.
- 6
Check out
Your basket shows each design with its size, material, quantity and a thumbnail of the approved proof. Add more products if you need them, then check out. You will be asked to sign in or create an account, because your designs, proofs, order progress and order messages all live in your account. Choose your delivery option and pay. Please treat your order as final at this point: the moment payment is confirmed, print files are created and material is allocated automatically, so orders cannot be cancelled or changed afterwards.
- 7
Follow your order
Every item in your order now has its own live progress bar on the order progress page: order received, print files ready, in the print queue, in production, completed. Our production team updates it as your labels move through the print room. Turnaround starts when you pay, and the current likely turnaround is on our delivery page. If you need to message us about the order, use the message window on the order page in My Account.